2A-FFL WooCommerce Plugin
Enable compliant firearm sales with FFL dealer integration
🛒 Plugin Overview
The 2A-FFL WooCommerce Plugin seamlessly integrates Federal Firearms License (FFL) dealer selection into your checkout process. Ensure full compliance when selling firearm-related products by allowing customers to choose their preferred FFL dealer for product pickup.
✨ Key Features
- Integrated FFL dealer search at checkout
- Interactive map display with nearby dealers
- ATF-controlled product designation
- Customizable warning messages
- Flexible checkout block positioning
📋 Prerequisites
Before installation, ensure you have:
- ✅ Active FFL API subscription and API key – Get your subscription here
- ✅ Google Maps API key (for dealer map display) – Documentation on how to get your key
- ✅ WooCommerce installed and configured
1 Install the Plugin
- Navigate to WordPress Admin Panel → Plugins → Add New
- Click Upload Plugin and select the plugin
.zipfile - Click Install Now, then Activate the plugin
- The plugin will appear in your Plugin List and Admin Sidebar
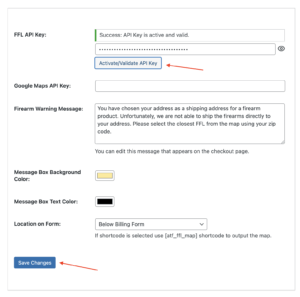
2 Enter API Key & Activate
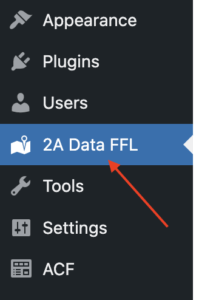
- Go to 2A Data FFL in the WordPress Admin Panel
- Enter your API key in the FFL API Key field
- Click Activate/Validate API Key
- Wait for validation confirmation
- Click Save Changes
✅ Success: The plugin will automatically validate and enable features once a valid key is entered.
3 Configure Checkout FFL Selection
🗺️ Google Maps API Key
Enter your Google Maps API key to enable the interactive dealer map on checkout. This allows customers to visually select their nearest FFL dealer.
⚠️ Firearm Warning Message
Customize the warning message displayed during checkout. Use this to inform customers about regulations, requirements, or important firearm purchase information.
🎨 Checkout Colors
Customize plugin element colors to match your store’s design and branding.
📍 Checkout Block Position
Choose where the FFL selection block appears on your checkout page. You can select a predefined position or use the [atf_ffl_map] shortcode for custom placement.
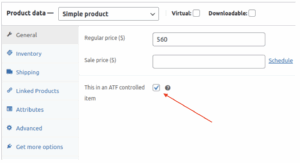
4 Mark Products as ATF-Controlled Items
⚠️ Important: Each firearm product must be individually marked as ATF-controlled to require FFL selection at checkout.
- Navigate to Products → All Products
- Edit the product you want to mark as ATF-controlled
- In the Product Data section, click the General tab
- Check This is an ATF-controlled item
- Click Save Changes
- Repeat for each ATF-controlled product in your catalog
🎉 Setup Complete!
Your WooCommerce store is now configured to sell firearm-related products with full FFL transfer compliance. Customers purchasing ATF-controlled items will be prompted to select an FFL dealer during checkout.
Need Help?
Our support team is ready to assist with plugin setup and configuration.